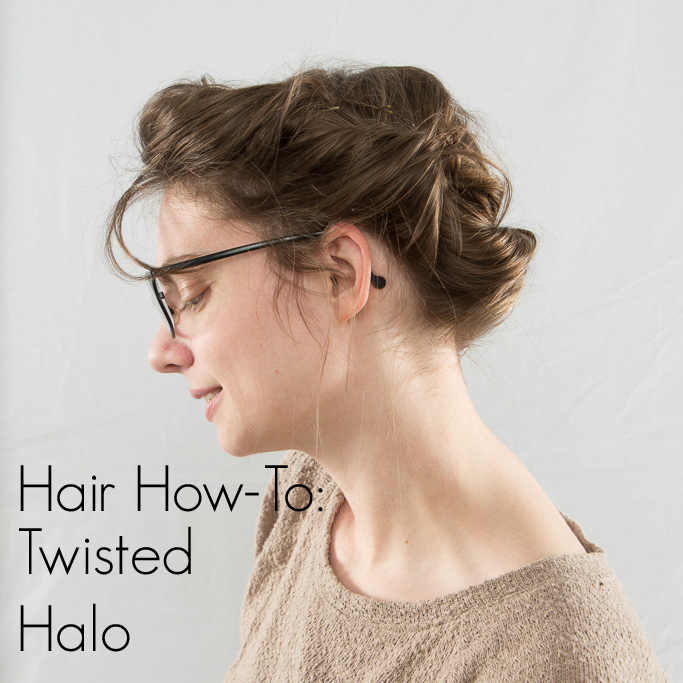
This is a hair-do for longer hair. The end result is a "halo" of hair wrapped around your head. Best of all, it is super easy to do and all you need are bobby pins!
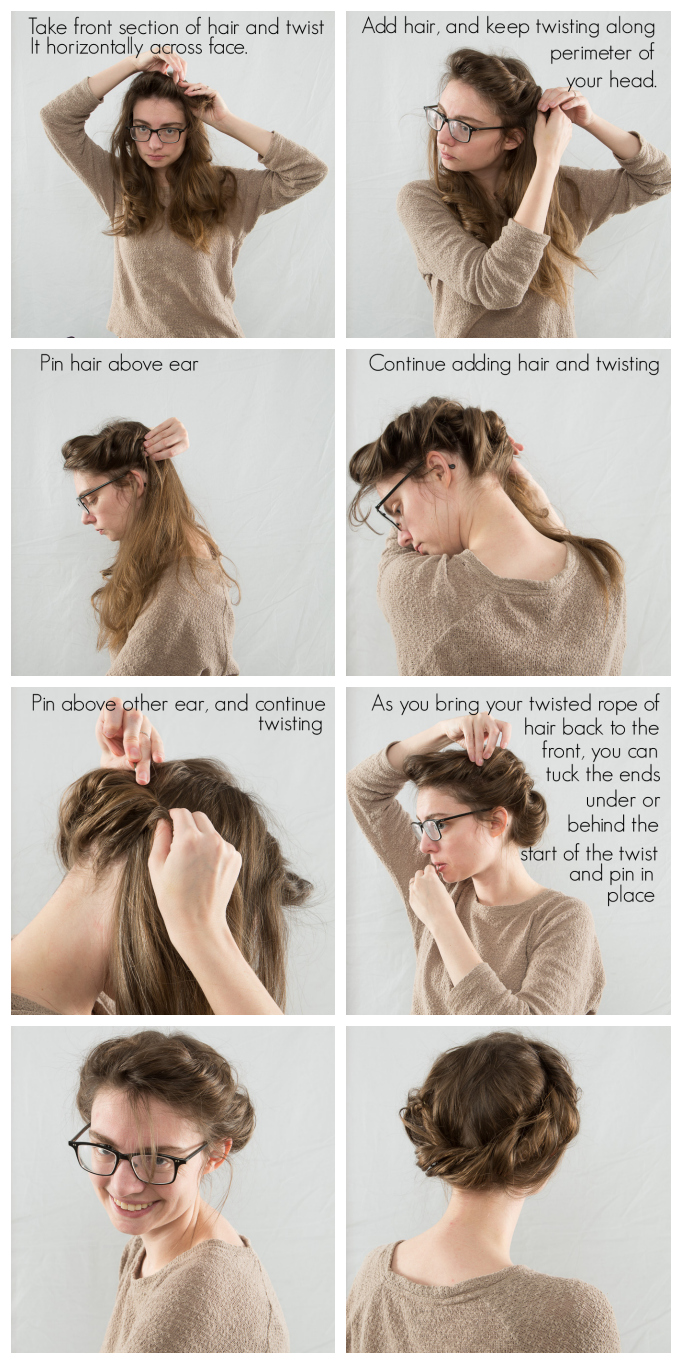
1) Take a front section of hair and twist horizontally across face.
This first section of hair should be your bangs, or, if you do not have bangs, the hair you would use to make bangs. Gather and start the twist off to one side of your forehead (I like up the start of the twisted hair with the outside edge of my eyebrow). You will twist it looses- I only need to twist is once or twice- so that the twisted puff has some volume to it.
2) Add hair and keep twisting along the perimeter of your head
There are two ways to do this. Both will involve adding more hair to the twisted bangs in order to start wrapping the hair around your head. For a more halo-like effect you will want to add all the hair on (this side of your face) that is in front of your ear at once, before going on. Once you've added all that hair, just keep twisting your hair around till you reach the area above your ear. For a more Edwardian look, add bits of hair with each twist as you go. This will look a little less like a halo and more like a pompadour. I am illustrating this hair-do with the later.
3) Pin above ear
Use bobby pins to secure the twisted hair to the head.
4) Continue adding hair and twisting.
If you are going for a more "halo" effect, you will gather a sizable chunk of hair. I would suggest all the hair behind your ear to the middle of the back of your head. Then twist all that hair till you get to the middle of the back of your head, and at that point add all the hair from the middle of the back of your head to your other ear at once. After that, continue twisting till you get above your other ear.
If you are going for the more Edwardian look, you will once again add a bit of hair every twist and continue to add and twist hair until you get above your other ear.
5) Pin above other ear and continue twisting.
Use bobby pins to secure the hair above your ear. Then- regardless of whether you are going for a halo or Edwardian look- twist the remainder of your hair all together, so it forms a rope. This rope will be hidden behind other hair.
6) As you bring your twisted rope of hair back to the front, you can tuck the ends in or behind the start of the twisted hair.
This completes the circle of hair around your head, forming the "halo." You will need to pin this in place. Then add any additional bobby pins anywhere you deem necessary.

I do this all the time. Especially on those days that my hair just doesn't want to cooperate. This is a great post.
Reply Deletehttp://nauticalowl.blogspot.com/
I'd love to see a photo of your hair like this.
DeleteSo cute! I've never tried this before but I just might today. Thanks for the tutorial!
Reply Deletexox Lara www.weheartbeautyblog.com
Let me know how it works out!
Deletebeautiful look! cute photos!
Reply DeleteThis is such a pretty hairstyle and seems pretty simple! I want to try this! It reminds me of Downton Abbey haha :)
Reply Deletexo inventedromance.blogspot.ca
It is rather Edwardian, isn't it? I'll just pretend I'm a Duchess wearing it from now on...;)
DeleteThis is so cool, I really want to try it! Love how the style looks on you too, just gorgeous :) Thanks for showing us how to do it!
Reply Delete~Alyssa
www.butterfliesonmars.blogspot.com
Wow, this looks amazing! ♥
Reply DeleteMy hair is a little bit short for this at the moment, but I can't wait to try this.
Abigail ♥
www.deardaffodils.blogspot.co.uk
oh my god thank you so much for sharing! Will try it out immediately! :)
Reply DeleteThis looks so beautiful and yet it's so easy to do. I don't think my hair is long enough but I'm definitely going to try it. I always love your hair tutorial posts ♥
Reply Deletexo
Ashley
Southern (California) Belle
Ohhhh I wish I had longer hair to do this with! Lovee this look, especially on you.
Reply Delete<3 katherine / of corgis & cocktails
This is a really pretty hairstyle, Kristian! I'll have to try it!
Reply DeleteLove this, it's amazing how many more hairdos I can do with shorter hair!! When I had waist long hair, it surprisingly was limiting in what I could do (and look good!)
Reply DeleteThere is definitely a sweet spot between too long and too short, isn't there? I got an inch or two taken off, which isn't much but even that I've noticed helps with hairdos.
DeleteCan't wait to see this on you sometime.
Wow, this looks awesome! I wish I had the skills to do something like this!
Reply DeleteThis is actually really easy! Hope you give it a try :)
Deletecool hair! never'd be able to do this, at least for a long time, but I can appreciate from afar:)
Reply DeleteI love this! Now that my hair is long, I'm always trying to find new ways to wear it. Thanks for the tutorial!
Reply Delete